Note: this article contains Amazon affiliate links for all paint products mentioned, however I always encourage you to support your local gaming store!
These Scimitar Jetbikes were my first attempt at replicating the Word Bearers scheme found in the Forge World Horus Heresy books, though at the time I wasn’t certain if I wanted to continue with the scheme.
I had every intention to leave this project as is, a test that I wouldn’t continue, but while photographing these models I have had a change of heart. Having been done over two years ago in 2018, they’re a bit rough around the edges and are lacking in finesse, but I’m surprised at how well the scheme has held up.
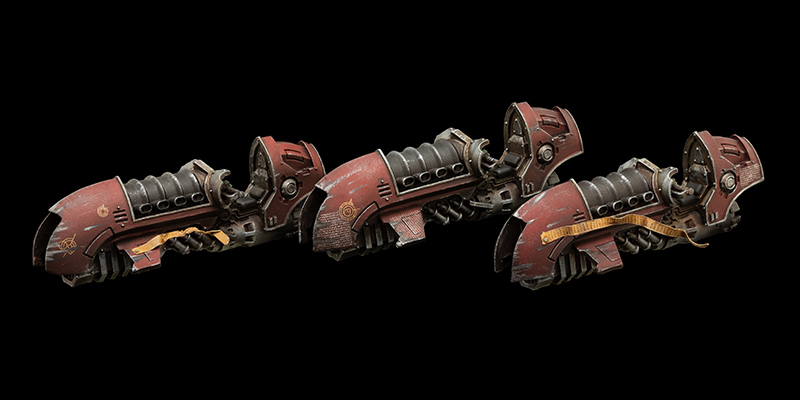
The primary red colour was achieved by first basecoating the bikes in VMA Gunmetal, and then highlighting with VMA Steel and shading the undersides with VMA Black Metal. This was then coated in three thin layers of Tamiya Clear Red, a transparent red-coloured paint that would tint the underlying silvers.
Once this was dry, the model was given a coat of matte varnish to bring down the saturation of the red, bringing it within spitting distance of the Word Bearers artwork I was trying to reproduce – you can see the stark difference between varnished and unvarnished in my instagram post back in 2018.
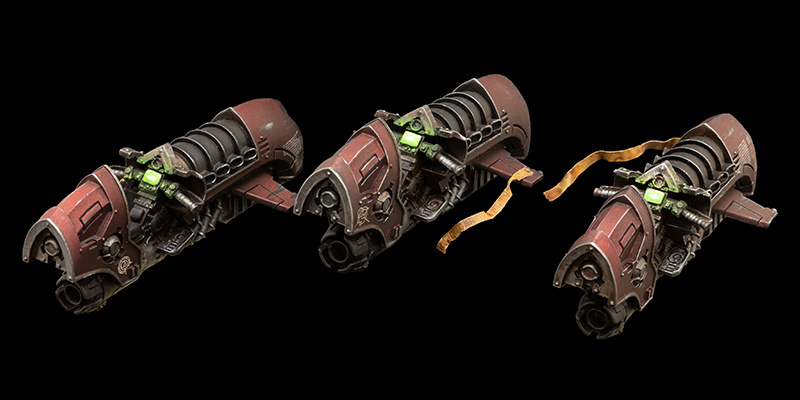
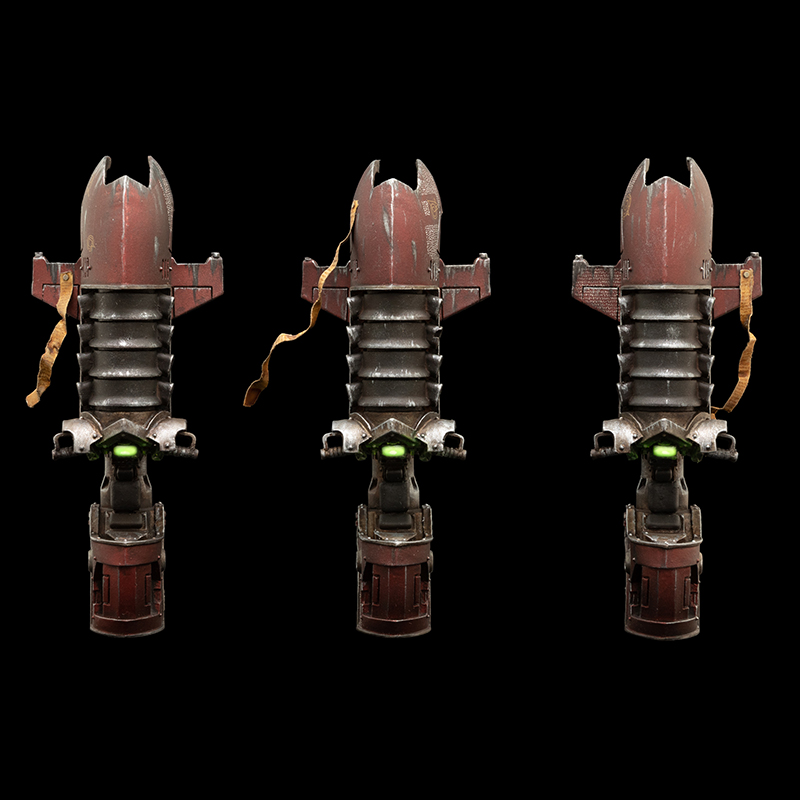
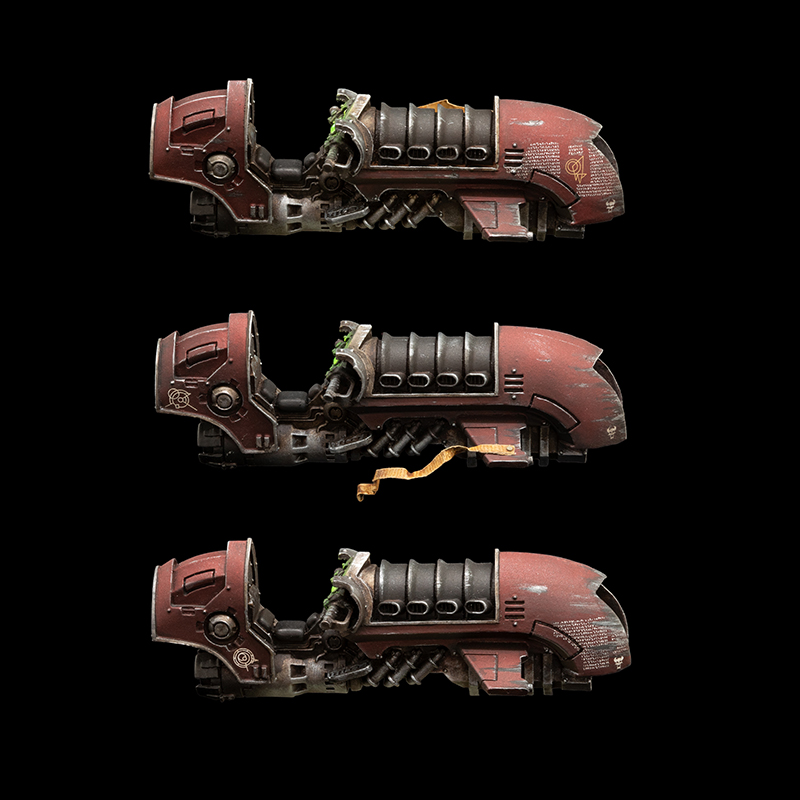
A key visual feature of all Word Bearers is their numerous parchments and scrolls, having goodness knows what sort of daemonic scriptures written upon them. This was my first ever attempt at getting this effect, and while many people will use greenstuff for this sort of work, I was worried that it would be prone to breaking off.
Instead, I used strips of printer paper soaked in watered down white/PVA glue, which were then posed into fluttering shapes and allowed to dry. These were then sprayed with a matte varnish before being airbrushed in sandy tones and given a brown acrylic wash. The finishing touch was to paint little squiggly lines to represent script, done with a very fine (Size 0 or 00) brush. This will definitely be put up as a mini-tutorial!
The display glow is a fairly simple effect here, the center console was painted white and given a bright green glaze, followed by a blob of white in the middle. This is one of those effects that always seems to look better on camera than in real life, so don’t sweat it if you can’t get the same effect in person.
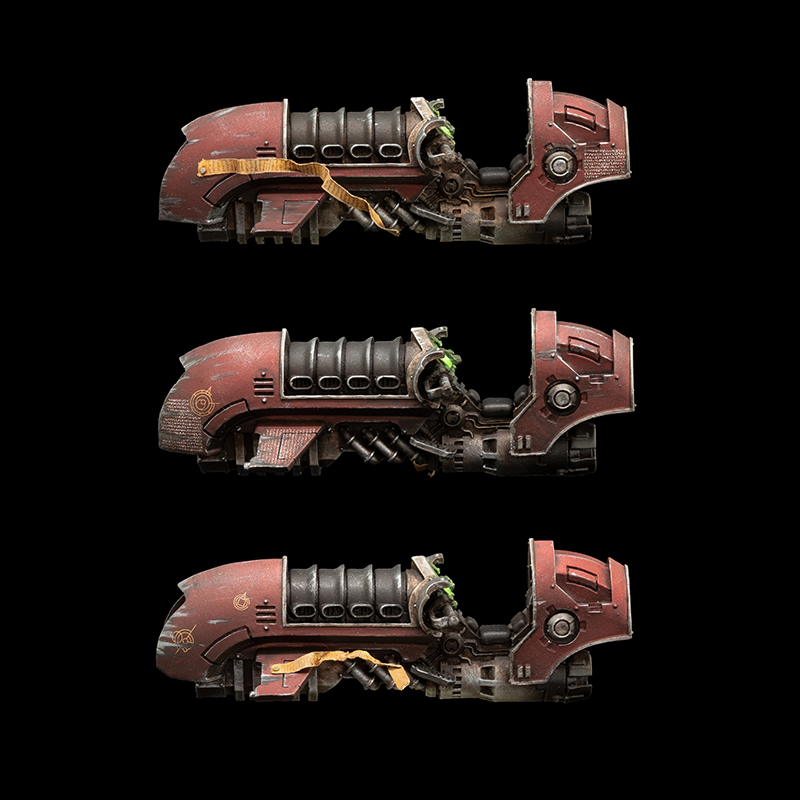
Word Bearers artwork has the various infantry and vehicle armour absolutely plastered in scripture, but at a tabletop scale this can easily start to look too busy. I decided to instead focus the waterslide decals on the largest empty areas of the model, providing some visual interest to the field of red.
The decals were softened with Microsol to allow them to better conform to the curved surface, and allow them to be cut easily where they overlap any panel lines. I’ll be covering seamless decal application in a future tutorial.
The metallics of the model were a fairly basic application of Vallejo Metal Color Gumnetal, followed by a brown oil wash, before being brought back up to their metallic shine with a further drybrush of gunmetal.
The engine exhaust was also given an airbrush of VMC Black to simulate soot build up, while the chipping and scratching on the front of the jetbikes was done with by quickly dragging a paintbrush over with VMC Black, then VMC Gunmetal. It’s important to do this sort of weathering after decals are applied, so that they’re realistically affected by the scratches as well.
After all this you might be asking “How are these WIP models?”, true they’re very close to finished. At this point, I would still need to do the riders, with which I struggled a bit with getting the Tamiya Clear Red applying nicely without obscuring details. I’ll also want to touch up some of the metallic parts of the model, and finish off console details such as the speed gauge.
Finally, the models will need basing and pigments. I’m not sure if I want a third force done up on a desert (as my Iron Warriors and Mechanicus are), so I need to think about what sort of setting I want them in along with what pigments will work best with the satin red.
Until next time!
-P